


How to Play as Sage in Valorant?
As a Sentinel agent in Valorant, Sage combines defensive prowess with unmatched team support capabilities, making her an indispensable pick across all skill levels. From holding crucial chokepoints with her ice wall to turning the tide of battle through perfect resurrections, Sage offers a unique playstyle that can make or break your team's success.
Step into Sage's world as we break down her abilities and uncover the tips and tricks to help you dominate matches.
Understand Sage’s Abilities
Healing Orb (E)
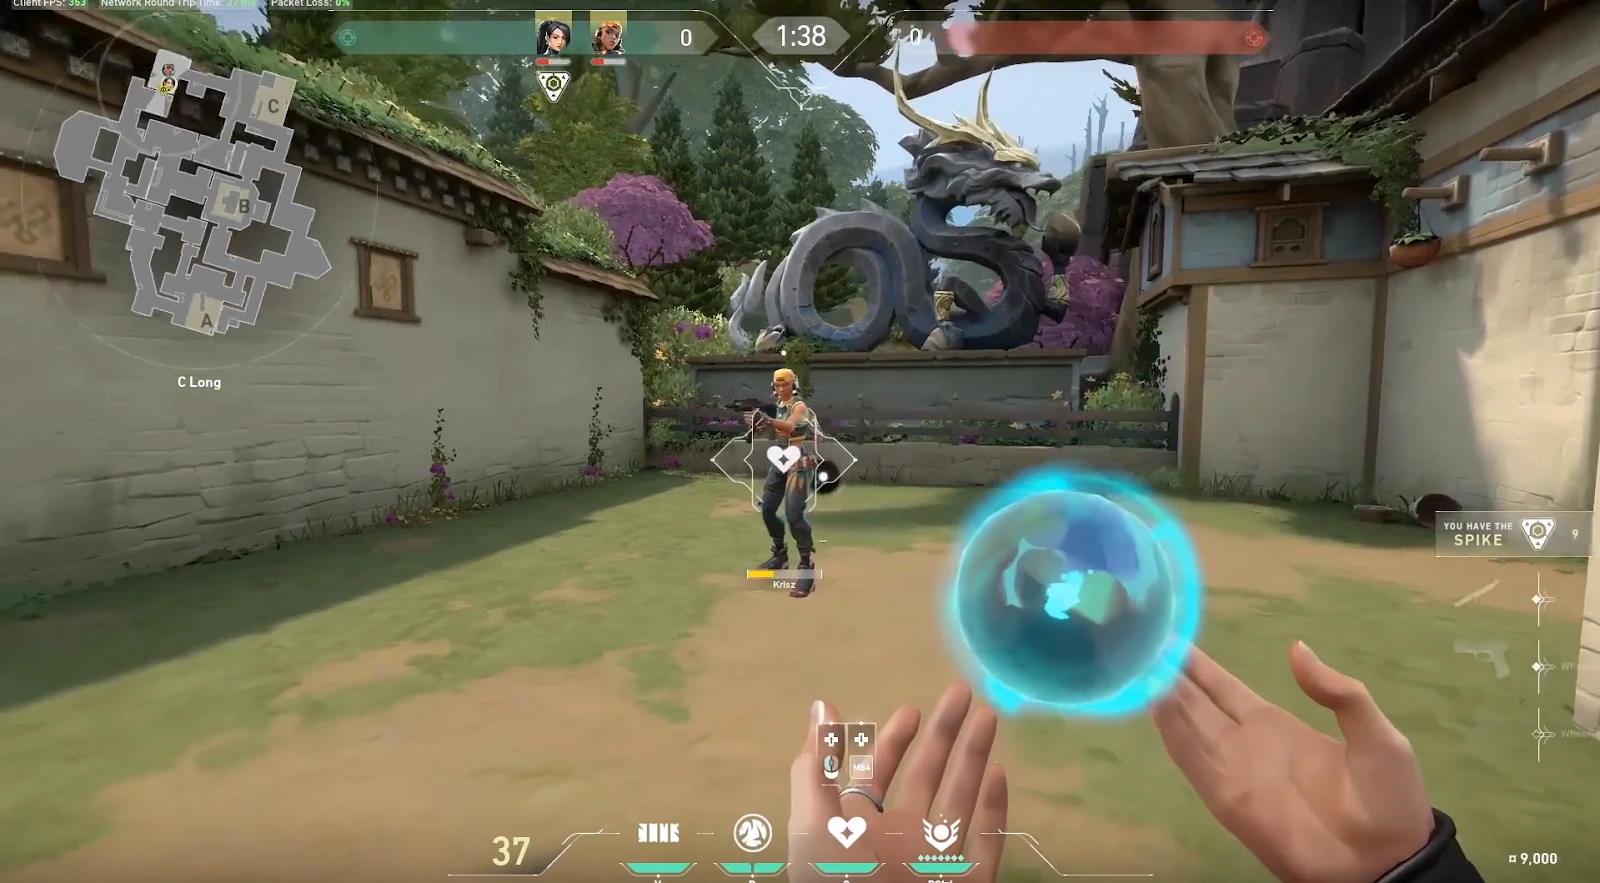
Sage's signature Healing Orb serves as the backbone of her support kit, restoring allies to full health over a 5-second duration. While self-healing remains an option, it provides significantly less value, restoring only 30 HP over 10 seconds. The ability refreshes every 35 seconds, demanding careful timing and prioritization.
As Sage, it's important to anticipate damage trades and position yourself to quickly respond to teammates in need. When deciding who to heal, prioritize duelists who are actively taking fights or controllers holding crucial positions. Don't hesitate to use your healing ability if a teammate is below 50 HP and you have it available. It's better to use it when needed rather than waiting for the perfect moment.
Additionally, as Sage, your teammates will frequently rotate back to you to receive a Heal Orb. It's helpful to let them know when your heal is ready or on cooldown to avoid wasting their time.
Also Read: Valorant Guide: How to Play Jett?
Barrier Orb (C)
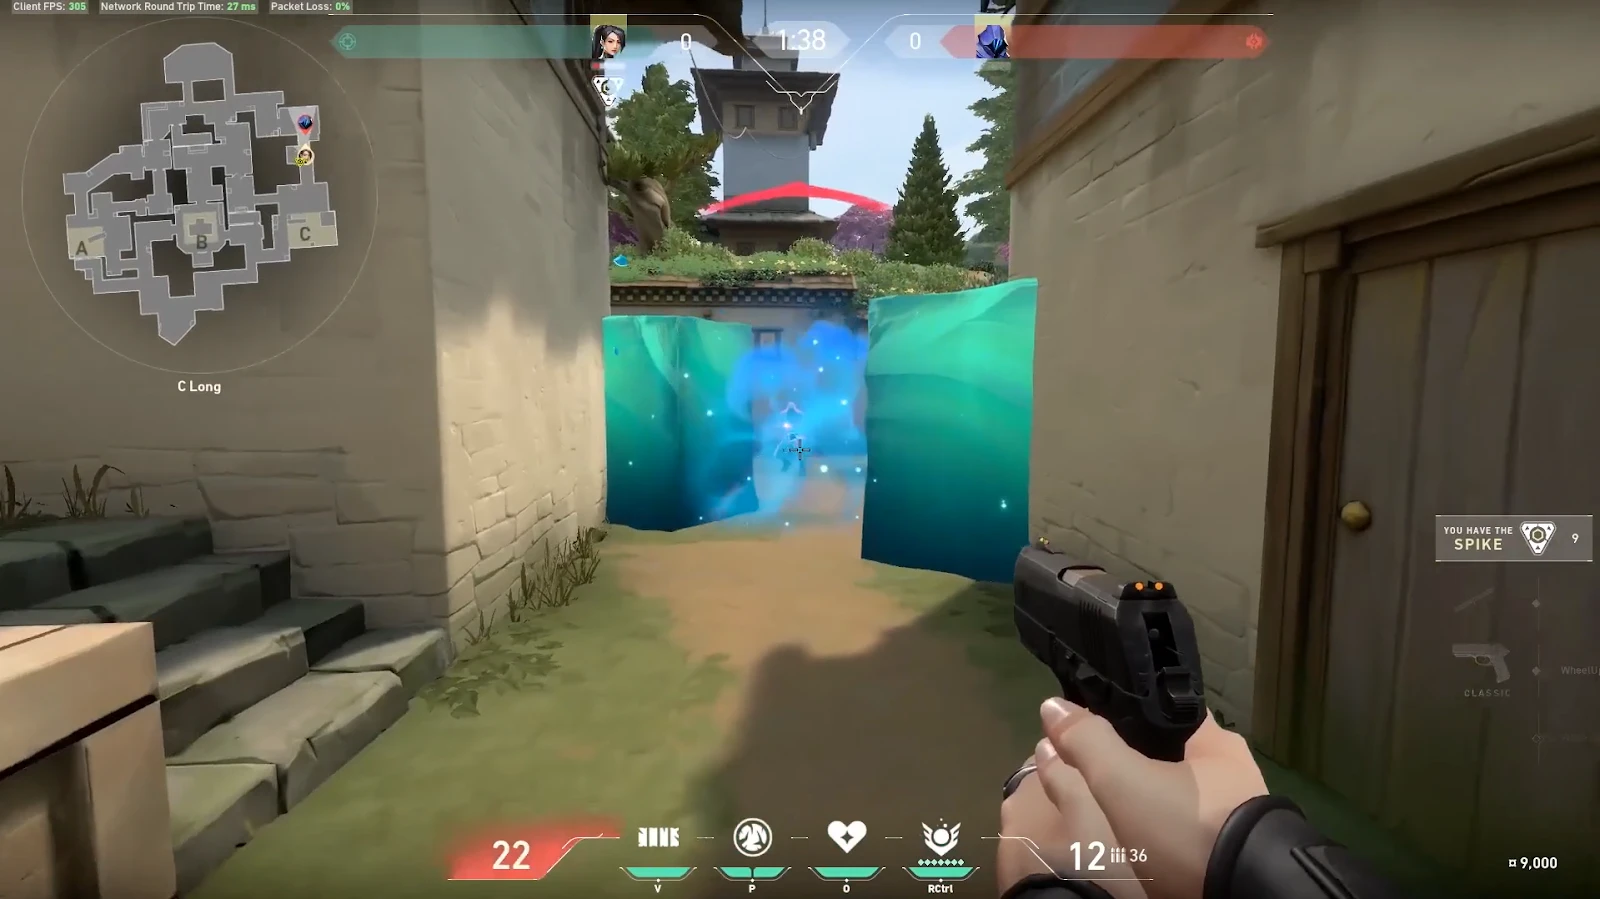
The Barrier Orb is her most versatile tool, costing 400 credits per round. This solid wall, divided into four destructible segments, lasts 30 seconds unless broken. Timing is crucial with wall placement, instead of reacting to the first sound of footsteps, use walls proactively to create unexpected angles or secure key positions.
When defending as Sage, vary your wall placements to remain unpredictable. A deep wall placement gives it time to solidify before enemies can damage it, while angled walls force opponents to break multiple segments. During attacks, save your wall for post-plant situations or to create safe paths for your team to enter sites.
Slow Orb (Q)
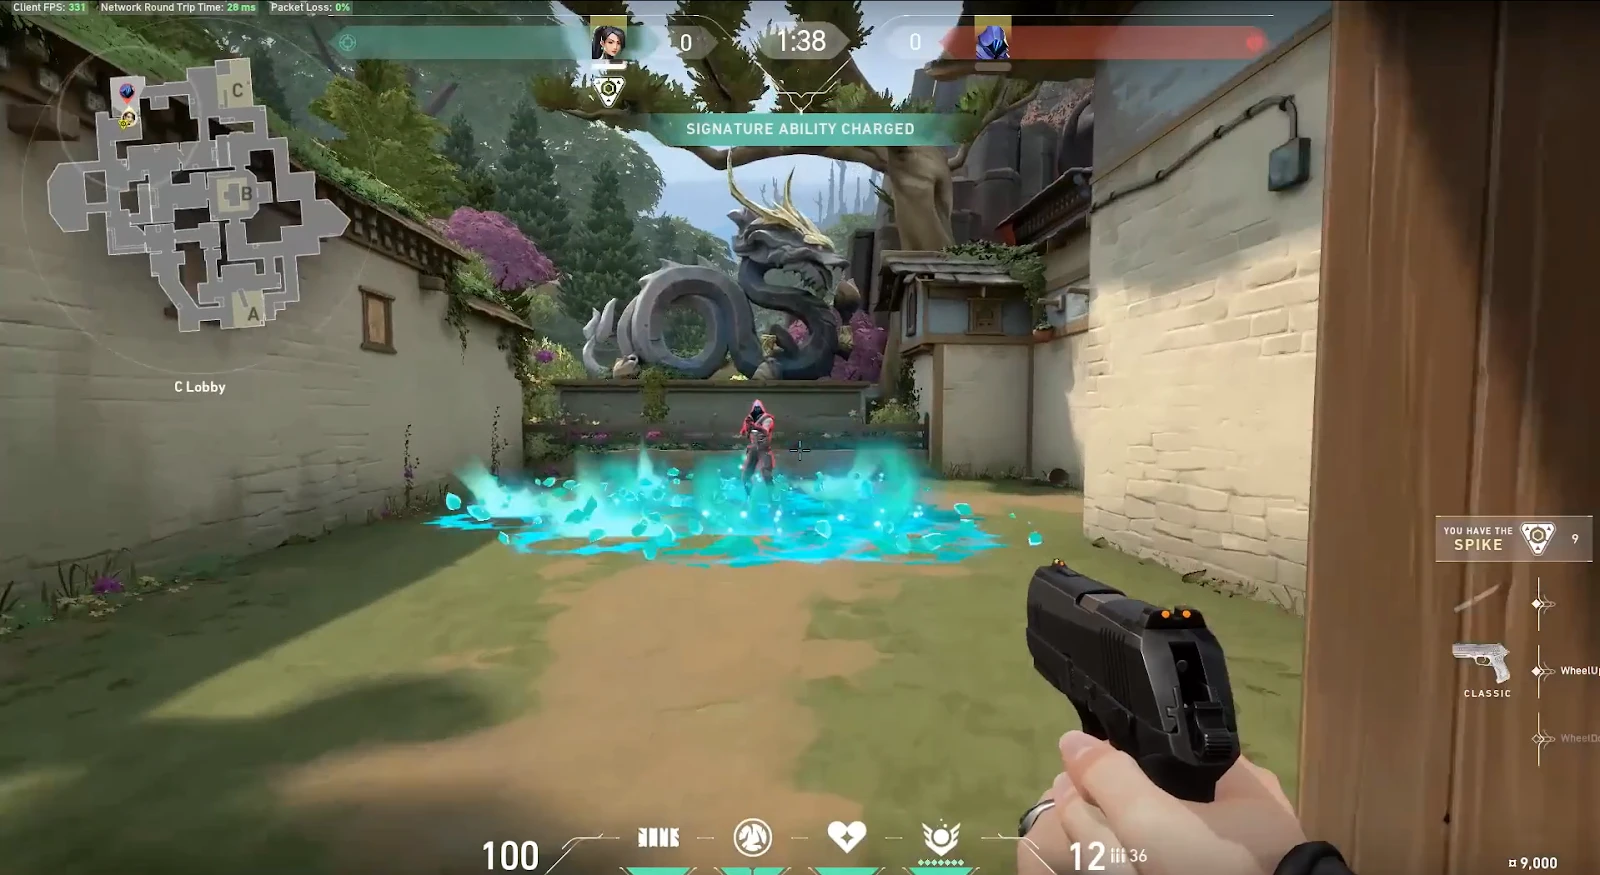
Costing 200 credits each, Slow Orbs are Sage’s signature ability that creates powerful control zones that persist for 7 seconds. Use these orbs to cut off rotations, delay pushes, or force enemies into unfavorable positions.
When defending as Sage, don't throw both slows immediately, stagger them to extend the delay effect. On attack, use them to isolate angles or prevent quick retakes after planting. Remember that enemies can walk through slows silently, so don't rely on them as a sole detection method. Combine them with team utility or use them to cover sound-masked rotations.
Also Read: Valorant Guide: How to play Phoenix?
Resurrection - Sage's Ultimate (X)
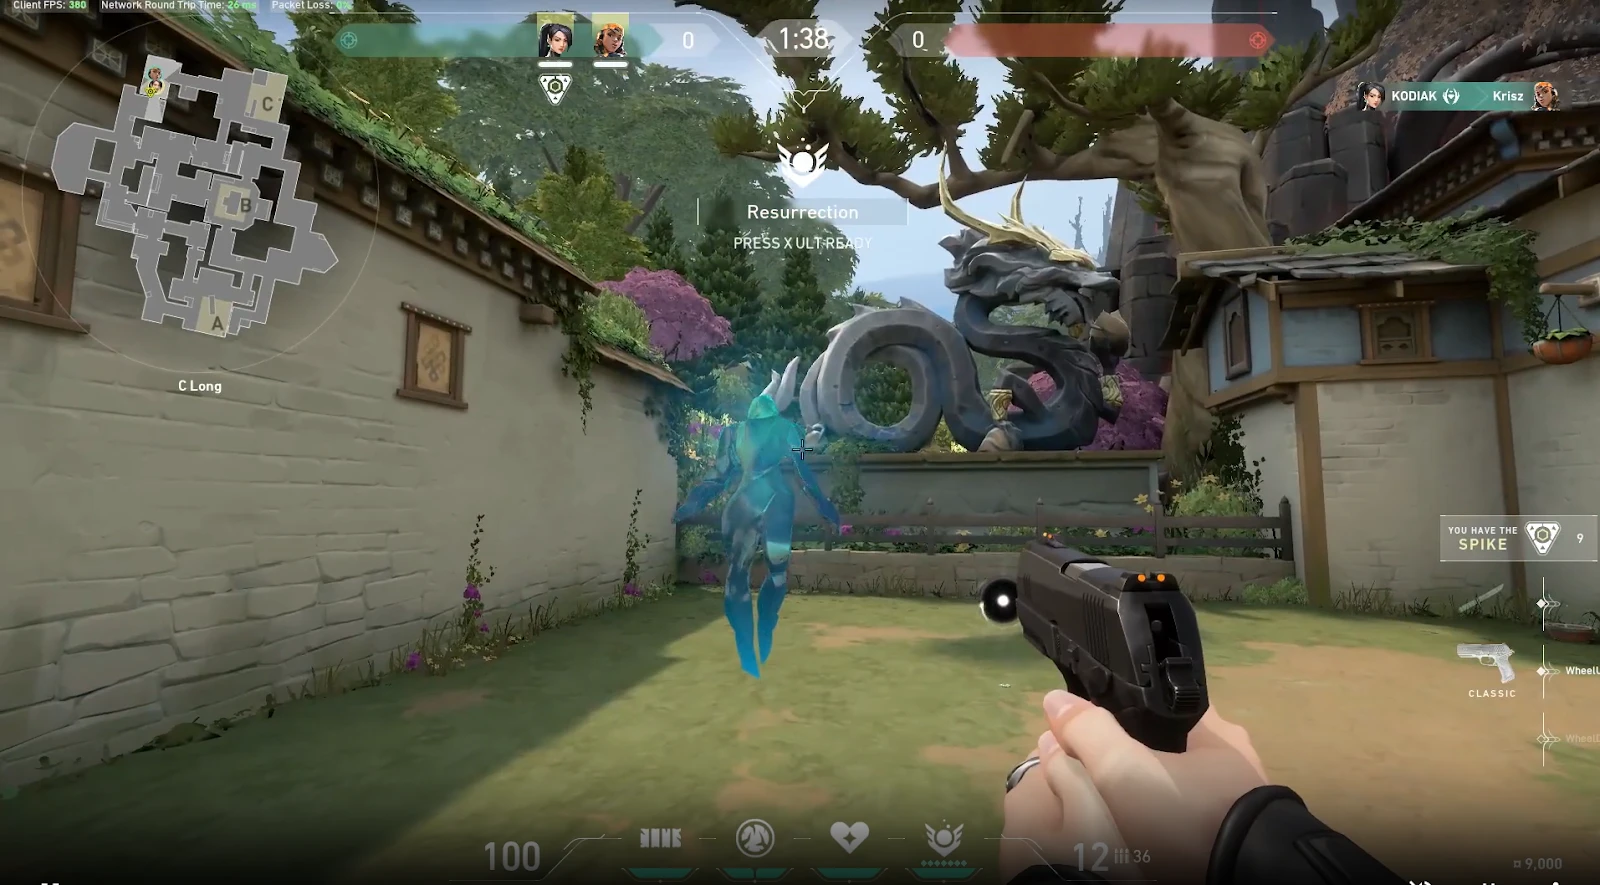
Sage's ultimate ability, Resurrection, can be a game-changer, but timing is crucial. It's best to use it when you can even up the numbers in a 3v4 situation, bring back a teammate with valuable weapons, or gain an advantage after planting the spike.
Before using Resurrection, make sure you have a cover or use Sage's wall ability to create a safe revival area if needed. Don't hold onto the ultimate for too long; using it in a 2v2 situation can be more valuable than waiting for the perfect moment, which may never come.
Optimize Your Economic Strategy
Managing Sage's economy requires careful planning since her full utility costs 600 credits. During eco rounds, consider saving money for the next round's utility instead of forcing a weak buy. In full-buy rounds, coordinate with your team about boost positions and wall placements to maximize impact. If your team is struggling economically, your heal and utility can help weaker weapons remain effective.
Also Read: Valorant Guide: How to play as Viper?
Map Awareness and Strategic Positioning
Each Valorant map requires a unique approach to Sage's utility. On Haven’s three sites, conserve abilities for mid-round rotations and crucial holds. The wall becomes particularly valuable for defending garage pushes or securing C long control, while well-timed slow orbs in mid can stall enemy executes effectively.
Split and Ascent's architecture enables creative wall boosts and angle creation. Use walls to boost teammates to rafters on Split or control market areas on Ascent. Mix aggressive and defensive wall placements to maintain unpredictability.
Meanwhile, open maps like Breeze and Pearl require walls primarily for creating safe paths and dividing large areas into manageable sections, especially around mid and main entrances.
Positioning is crucial regardless of the map. Stay close enough to support teammates with heals while maintaining safe distance from immediate threats. When defending, position slightly behind site anchors; when attacking, hold positions that allow quick rotations to different areas. Remember that staying alive with utility available often impacts round outcomes more than taking aggressive early fights.
Valorant & GameBoost Products
You're finished reading, but we have more informative content that you could learn from. In addition, we offer game-changing services that can elevate your gaming experience to the next level. What would you like to do next?
Valorant Accounts For Sale
Buy Valorant Points
Valorant Boosting Service
View all GameBoost Accounts
View all GameBoost Boosting Services
View all GameBoost Currencies
View all GameBoost Game Keys
View all GameBoost Gift Cards
View all GameBoost Items
View all GameBoost Top Ups
Counter-Strike 2 Skins
“ Kristina joined GameBoost in 2024 as an SEO specialist and quickly became the go-to writer for third-person shooter and competitive games. She covers titles like Fortnite, Valorant, League of Legends, GTA 5, and Roblox, focusing on how-to guides, practical tips, and updates.”

